
Class 5 Progress
- tvalencia2010

- Jan 23, 2023
- 5 min read
After the class session for class 4 commenced, I knew I had to restart the project to fully understand the concept that I've been having trouble with. I also decided to use a different plate that may be easier to get the concept down, compared to a stairs plate that would have to replicate the stairs. I decided to use this background shadow plate.

Because I used a different plate, I had to convert the different exposures taken by the camera in Photoshop to make one HDR. Like last time, I removed ghosts, turned off complete toning, and make sure it was on 32 bit. After having it calculate that, I cropped it and exported it.

Then, I used the cube photo that was provided to match the perspective of the camera. This is the first hiccup that I experienced. Like the other cube that I matched, I tried my best to patch it and then tried using the z if needed. I knew I needed this to be correct in order to continue, because the other portions relied on this. I spent 2 hours tinkering with it and could not get it to align at all. I tried searching up solutions and I could not understand why it would not align no matter what I did. Then it hit me, I did not change the focal length. The biggest lesson learned, if you're perspective matching MAKE SURE TO HAVE THE SAME FOCAL LENGTH USED WITH THE CAMERA. I will never make this mistake again.
The focal length was 116.

After that tragedy was solved, it took me 15 minutes to align the cube.

Okay a small update: I ended messing up the cube because unbegknownst to me, the cube decided to change the poly cube history so when I align the cube is was kind of correct, but not the correct depth. Because when I added the sphere with the correct measurements, the camera looked too close and the grey ball did not match with the grey ball in the image plane.

Finally after align the correct cube accurately, the grey sphere lined up with the cg sphere really well.

This was my second mistake, where I could to figure out why the geo dome was not emitting any light. It took a while to figure out, and I had originally thought it was the two sided lighting option, but It was because I placed a Maya standard shader instead of a Maya surface shader. The Maya standard will not emit light correctly.

After I got the lighting set up, I matched the HDR to the chrome ball in the cg scene as accurately as possible, once I felt confident that it was as close as it could be, I added the spotlight and aligned it to what I thought was the key light needed for the scene. It was a little difficult because there is a bright side window, but the shadows predominately came from the top keylight.
I also began building up my render layers with the ball render layer that will only render the ball itself and the shadow layer with a red shadow that will be used to make a mask in Nuke.

I began my first passes in nuke and tried to match up the grey ball with the grey ball reference. I knew my lighting was too soft because there was a really harsh crescent shadow on the ball that I was trying to replicate. The shadow on the ground needed to be tweaked which dealt with the light direction.

Then, I was trying to get my ball ready to do the first pass render. I added my AOVS which was specular and diffuse direct and indirect. Make sure that Merge AOVS is on. It is not on here, but I promise you that I made sure it was on before rendering, otherwise it will make folders for every render layer.

Again I tried to match the shadow position as close as possible to the shape of the crescent on the ball while looking at the specular highlight as a guide. I looked at it side by side as I was working and that was when I could realize the difference in shadow quality.

To set up my Nuke script, I made sure everything was nice and neat thanks to the use of elbows and backdrops. I then shuffled out all the aov layers to use. This was my first pass so I wanted a read on what the composite would look like now and then would go back to Maya to continue to tweak it.
The Foreground consists of the rendered ball layer.

And the background consists of the shadow pass with the shadow plate and the clean plate. I needed to reformat the plate to fit the resolution I rendered at and then I merged using in so that It would only pick up the shadow plate where the shadow mask was.

This was my first shadow pass. As you can see the shader and lighting is super bright and there is a lot of bounce light that should not be there. I played around with color correcting the shadow and avows to get the desired look.

At this point, I brought it back into Maya and fixed both the shader and the light to have it more accurately look like the grey ball in the photo.

Then I got my environmental shadow prep render layer ready with all the correct layers included.

Then, I decided to do the second technique that was taught to us. That is by taking the clean plate and extracting the shadows and filling them with red and everything else with shadow. This will create a mask.
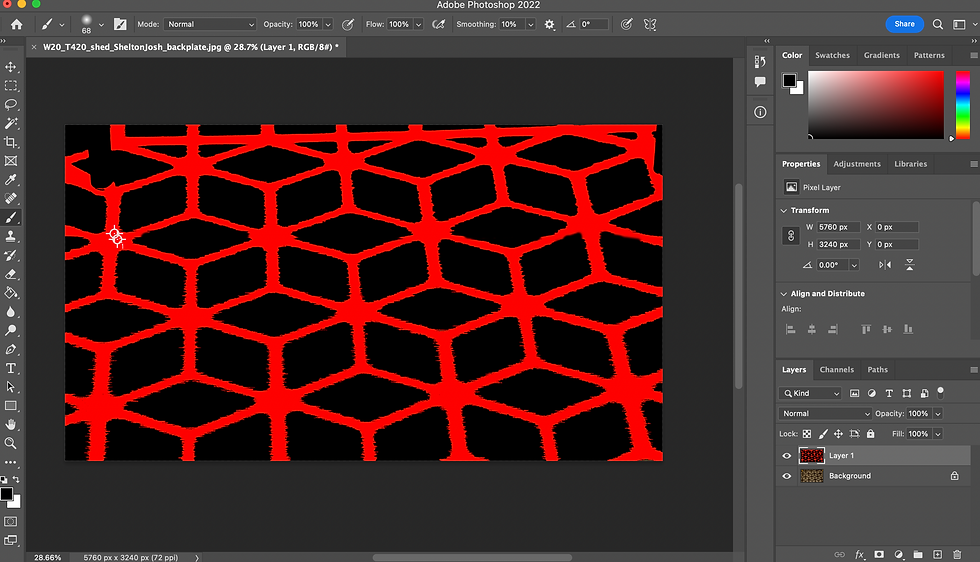
I projected that using the Maya surface shader from the spotlight camera that I had originally created for the environmental prep. So we are looking through the render camera but projecting the environmental shadow matte through the light camera.

the plate needed to be extended in photoshop because as the ball ran off the plane, it would show the outside of the matte created and it needed to be tiled. I rendered a frame from the key light camera and had to change my focal length to fully fit the tile. Then using free transforms and multiple layers, I was able to manually tile it. Any additional tweaking was fixed using the paint brush.
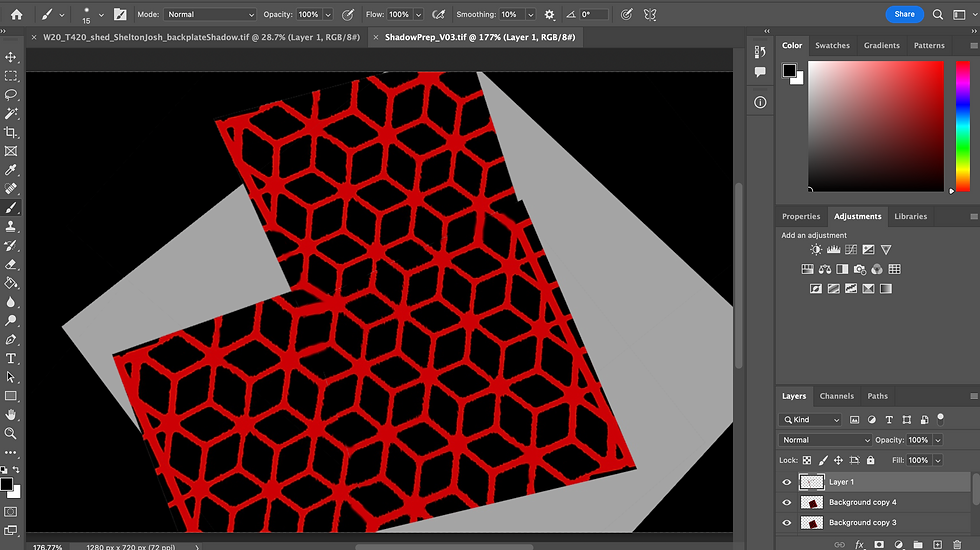
After tiling and taking it back to nuke and tinkering with any color correction that was needed and layering on the environmental shadow on top of the diffuse and specular we can begin to see the shadow appearing on the ball. This was my most recent render.
My next steps are to choose a circular object that can roll on the ground and continue to try to get the same edge quality on the shadow as the shadows on the floor because as of right now, they are very sharp.

Comments