
PHVFX X SCAD: Week 6
- tvalencia2010

- Oct 30, 2022
- 3 min read
This week my team worked on continuing our devolopment. Emma worked on the flower rig along with the particles emitting off of the flower. Xander continued look development and getting the textures down for the flower. Hannah continued her roto work with the hair and the arm.
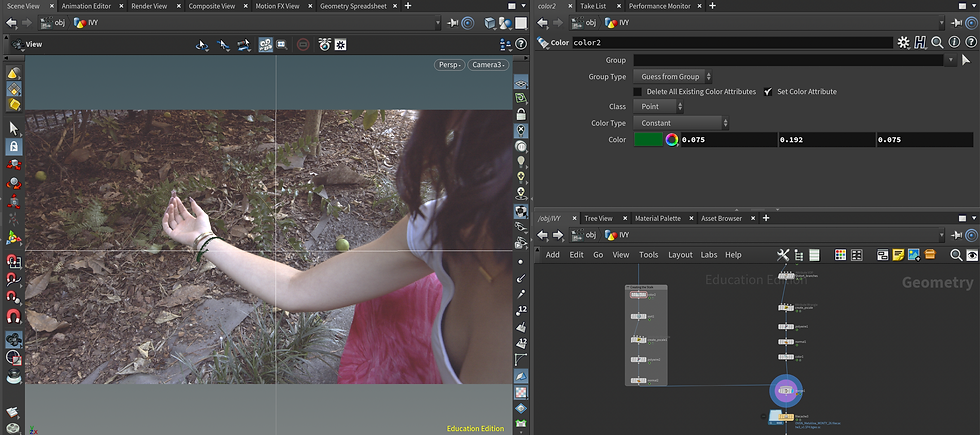
I continued my work with the vine and implemented what I learned from the R&D on the latest meta human model that was given from Emma. The meta human mesh was more accurately tracked with the plate.
Creating the Animate Curve
After putting in the mesh, I added normals and created a curve that would follow the the meta human movement using a ray and attribute interpolate, explained in Week 5 blog. Once the curve follows the meta humans movement and I have prepped the metal human with the correct normals, I am able to transfer the normals to the points on the curve to use to grow out the branches later.
Before transferring the normals, there are no normals on the point.

After transferring the normals from the meta human, the normals will grow pointing out

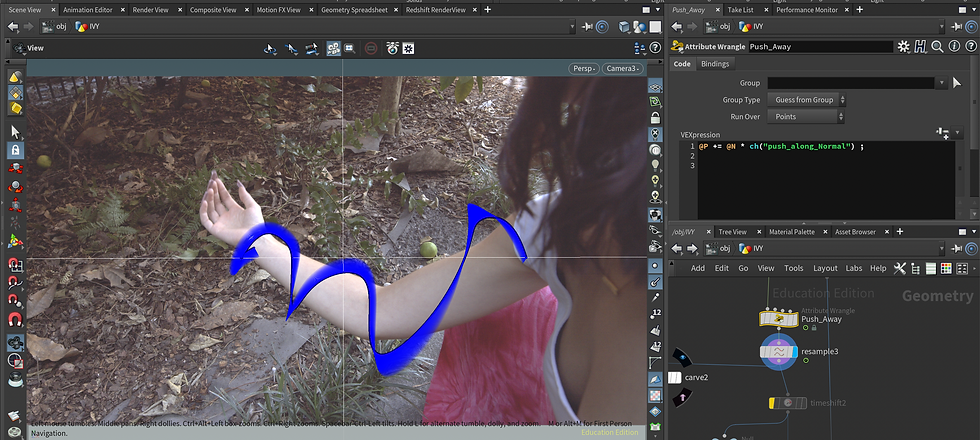
After that I added a point wrangle to push out the curve using normals to avoid clipping.

Finally I resampled the points along the curve so there is a smoother attribute transfer along with a smoother carve animation. The more distance between each point, the crunchy the transition will be.
Creating the Vine "Growing" Up the Arm
The carve node is used to create the growth of the vines stalk. When keyframed, the Second U carves up from one end of the curve to the next, creating a growth base for the vine.

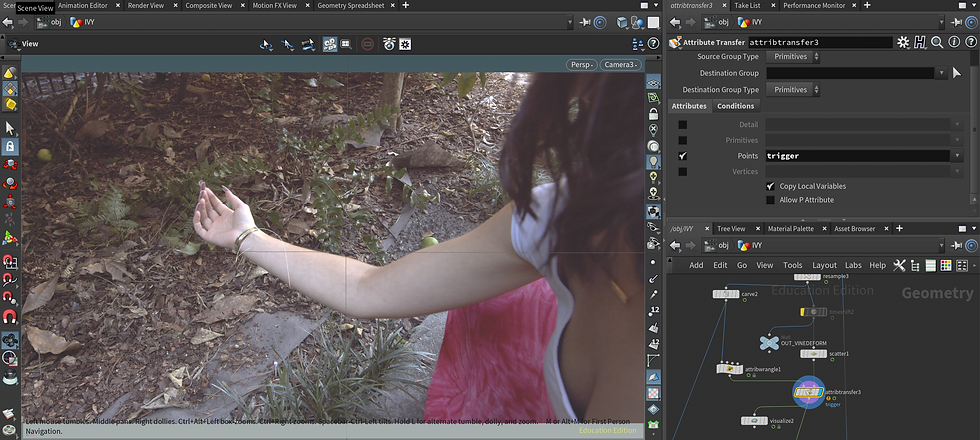
After that, an attribute wrangle is used to run over the point and assign an attribute trigger a float number 1. That will be the basis of the attribute transfer as the carve node animates up. The attribute transfer will take the scattered points from the original curve and place them as the curve grows up based on the attribute trigger.
I used a solver that would create a growth attribute based on the trigger attribute as the points are added.

Creating Small Offshoots of the Vine
Finally, I used an attribute wrangle to create the branches. It takes a point on a curve and creates geometry based on the any geometry that is close it it. It will stick and grow to that surface. In this case, it will stick to the mesh. Because I needed the solver to move on animated curve, instead of a static curve, I had to change the inputs, therefore it has a slightly different behavior. However, it still grows out and creates the curve needed for the small tiny offshoots.


Because I do not want the branches to grow out straight, I used an attribute VOPS to distort the branches. This attribute takes the position of the points and runs them through a curl noise that is controlled by parameters. then it adds it to the position and returns that position out in the top output.

Parameters are listed at the top level:

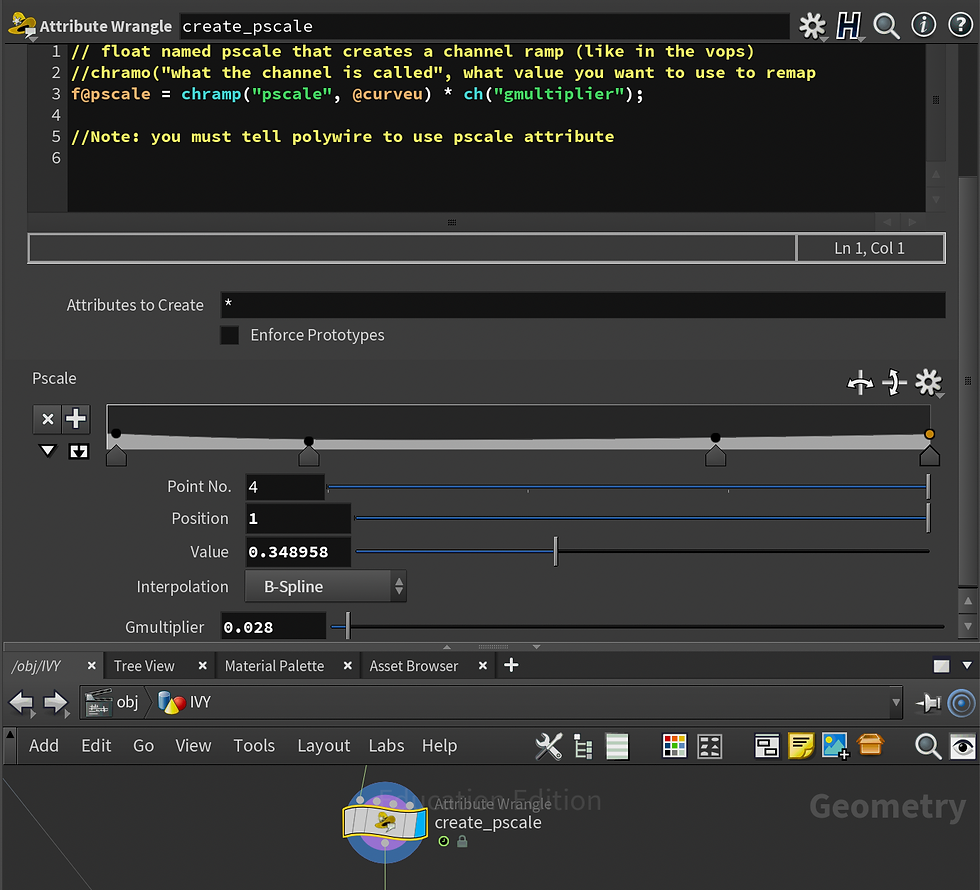
To create the shape of the offshoots and to have more control of the kind of shape, an attribute wrangle is used to create a float attribute called scale that is based on the ramp and the multiplier.
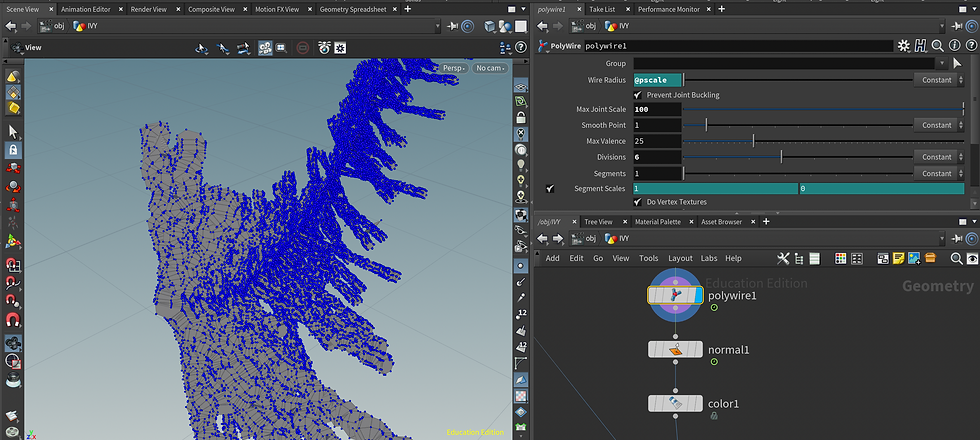
The last step to creating the offshoots to texturize the vine, is to use a polywire to bind geometry to the curve. The information created from the pscale attribute wrangle is plugged into the wire radius. The normal node resets the normals from the direction of the original curve to normals based on the polys.
Creating the Stalk of the Vine
The last thing to consider it the actual base of the vine. The process above was to create the natural looking offshots that create texture underneath the leaves and make sure the curve is growing correctly. An input from the carve node is used to create a polywire that will taper at the end and the radius and determined by the pscale point wrangle.
The goals for next week is to add all the variations of the leaves and to get a rendered out version to composite.
Comments